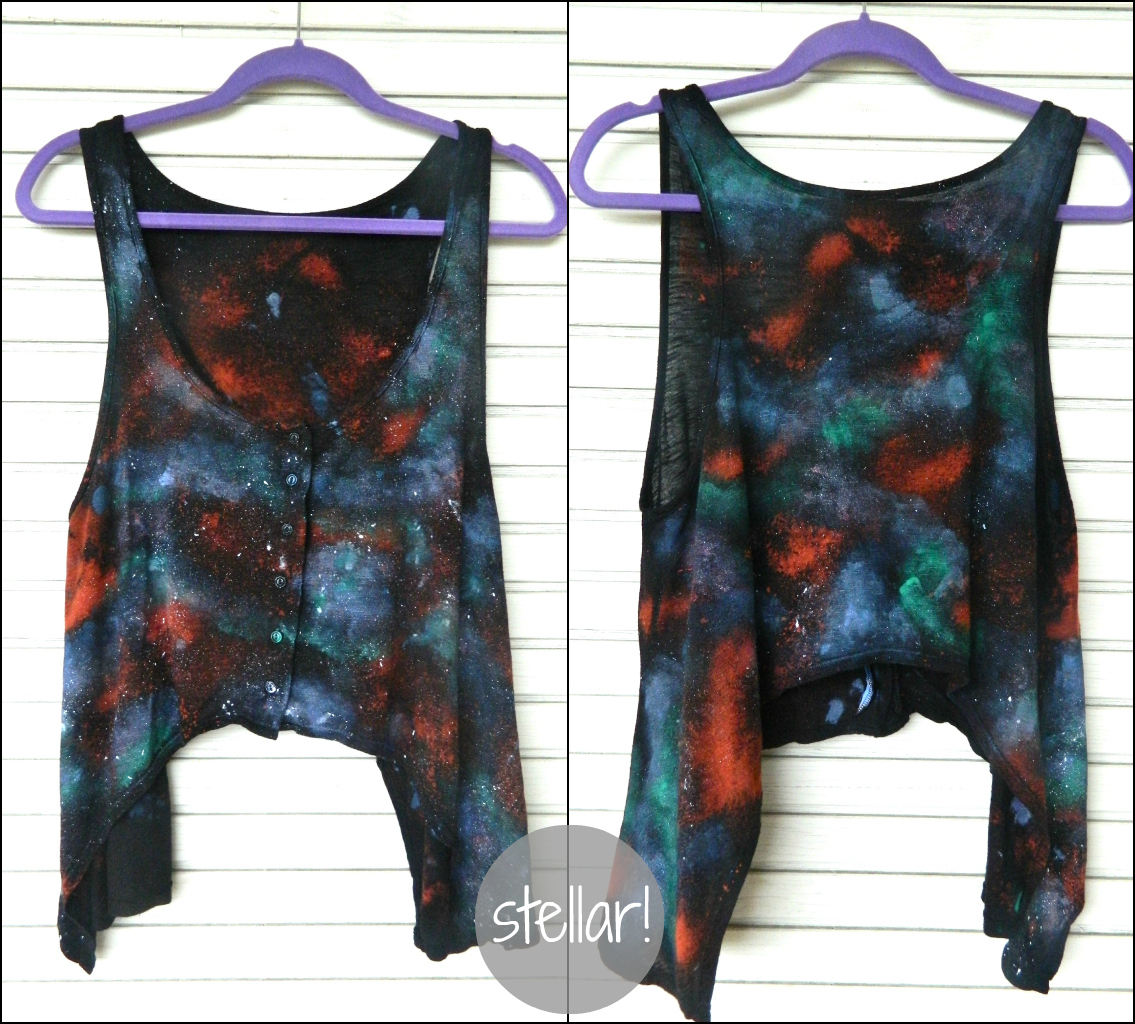
As you all are well aware by now, I am galaxy obsessed… still. This is one print I am just not getting over any time soon. Recently I did a fabulous DIY Moon Manicure, and it inspired me to test it out on some fabric. Using a similar process as I did with my nails, I ended up creating one of my new favorite pieces in my wardrobe. It was surprisingly easy, and only took about an hour to complete. Next time I am going to do it on a mini skirt.

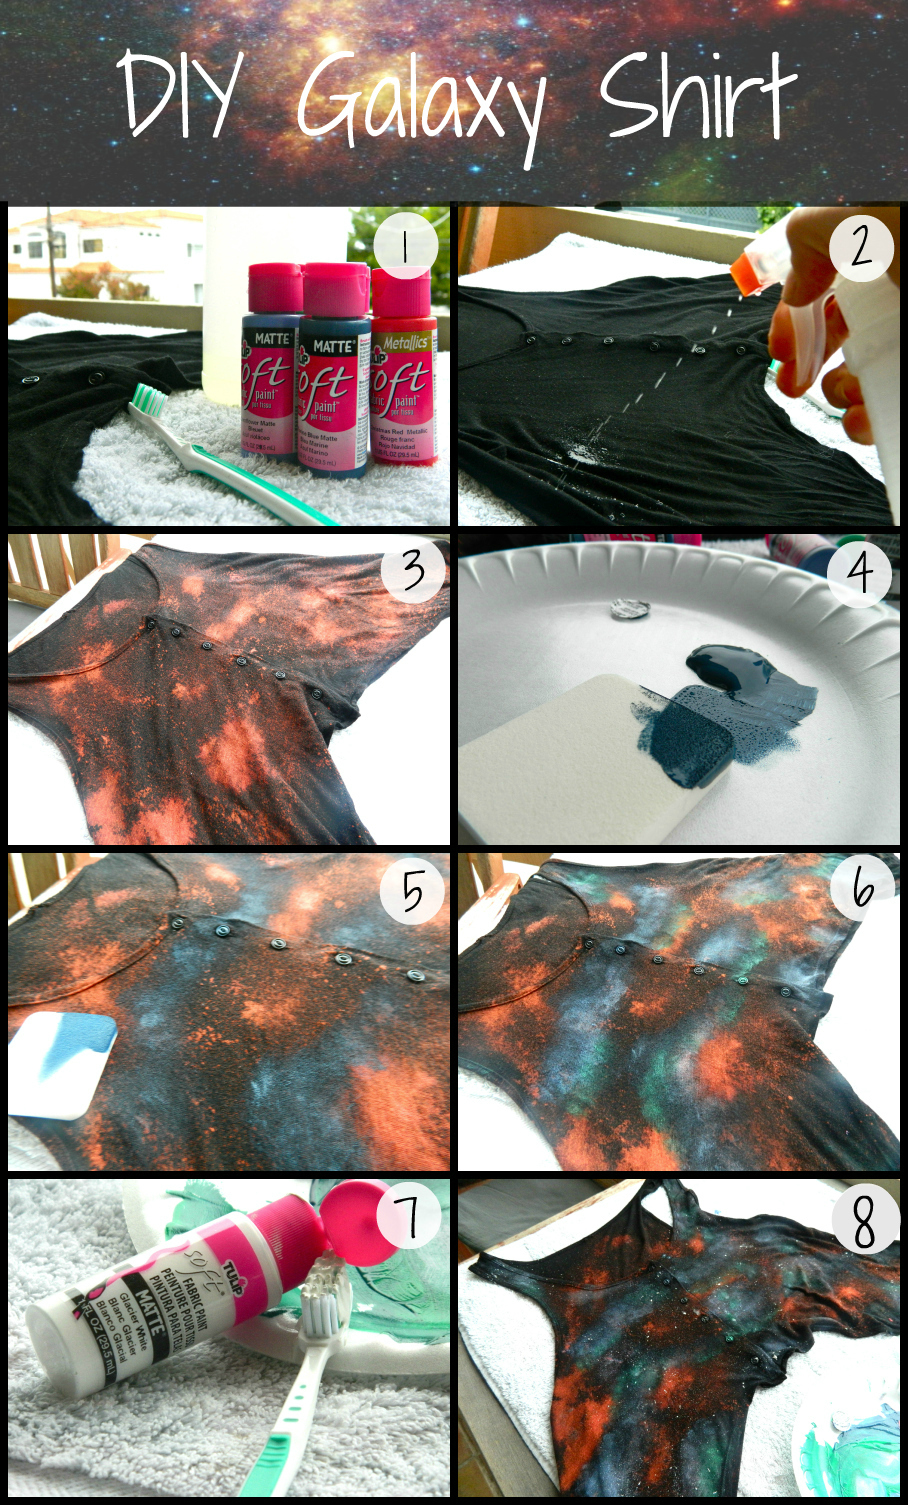
+ Step 1: Get ready by laying out a towel & gathering your supplies. All you need is a spray bottle filled with a bit of bleach, some fabric pants (I used a dark blue, light blue, kelly green, red, and white), a sponge, and a toothbrush.
+ Step 2: Start off my spraying various parts of your t-shirt with the bleach.
+ Step 3: Wait a minute or so and you will start to see the base of your galaxy form as the dye begins to bleach out the fabric.
+ Step 4: Now for the fun part! Prep your paints and get ready to sponge. All you need is a quarter size drop of each color, a little bit goes a long way.
+ Step 5: When sponge painting your shirt you really can’t do wrong. My general technique is to start with the dark blue and sponge around the bleached spots, next I use the light blue and create a milky way type galaxy in a few places. Once you get here, you will really start to see it look a lot like galaxy.
+ Step 6: Throw in some green in various spots as well as a bit of red, or you can mix blue and red and use purple! Have fun with it and get creative!
+ Step 7: Now time for your stars. Using the white fabric paint, apply it to your toothbrush as you would toothpaste.
+ Step 8: Using your fingers (this will get messy) flick your toothbrush over your shirt to create the perfect amount of stars!
